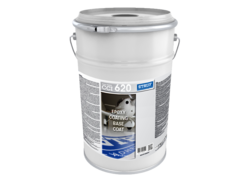
CCI-620 Aria White
Epoxy Coating Base Coat
Special features
- Pre-colored for white coats
- Special formulation for thicker coats
- Suitable for airplane hangars

Epoxy Coating Base Coat
Special features
| Product Description |
| Pre-Installation Checklist |
| A successful installation requires proper preparation of the subfloor. Read and understand all applicable guidelines and Technical Data Sheets before installation. |
| Sub Floor Examination |
| Prior to installation, the subfloor must be checked according to applicable installation guidelines. It must be solid, sound, clean, porous, free of chaps, anti-adherents, and resistant to pressure and tension. Confirm sufficient porosity by performing a water drop test according to ASTM F3191-16. Check for missing or compromised vapor barriers and hydrostatic pressure by carrying out RH or CaCl moisture tests following ASTM standards F1869-16 or F2170-19. Results of 99% RH or 25# CaCl could indicate a higher moisture content in the slab than what tests can measure, and there might be hydrostatic pressure and/or a compromised or missing vapor barrier. |
| Sub Floor Preparation |
| The subfloor's condition will determine which type of mechanical treatment is required (e.g., wire brushing, sanding, grinding, or shot blasting). Dust, paint, curing compounds, sealers, residual adhesives, or other surface contaminants MUST be removed, and a porous surface must be achieved by suitable means. The installer can only determine the extent of subfloor preparation at the site. Clean the surface with an industrial vacuum cleaner and tack the floor with a damp microfiber mop before application. Do not use sweeping compounds unless water-based, as most others contain oil or wax, which will act as an anti-adherent and prevent primers, sealers, leveling compounds, coatings, and/or adhesives from bonding to the concrete. Cracks and gaps must be treated before application of primers, sealers, leveling compounds, coatings, and/or adhesives (see Technical Information #19 @ www.staufusa.com). |
| Mixing of Components |
| The bottom container contains a hardener. Separate pails by inserting a screwdriver between the upper pail and the lower lid, careful not to puncture either one. Open both pails and let the hardener flow into the larger bucket for one minute. All of the hardeners must drain into the pail before mixing Parts A & B. Mix both components with a mixing paddle for at least 3 minutes. Use an electric drill with less than 300 rpm until an even color is reached. Avoid air entrapment by mixing slowly and using an appropriate mixing paddle. Make sure to mix along the wall and bottom part of the container as well. The temperature of both components should be at least 50°F before mixing. |
| Installation Procedure |
| Mix pail according to mixing instructions. Apply coating undiluted with an approved applicator. Make sure the coating is spread evenly and up to the perimeters. The spread rate is critical for a successful installation. Do not exceed the minimum or maximum coverage. |
| Limitations |
| When using other than STAUF products in conjunction with STAUF primers, sealers, leveling compounds, or adhesives, STAUF denies any and all responsibility for any ensuing problems and/or damages without prior written authorization from STAUF. |
| Do not dilute primer/sealer or mix with other products. |
| Sealer will not prevent moisture damage from hydrostatic pressure, missing or compromised vapor barriers, underground springs, damaged water pipes, sinks, icemakers, faulty plumbing, flooding, etc. |
|
|
||||||||||||||||||||||||||||||||||||||||||||||||||||||||||
| Revision: 2022-05-24 15:00:24 | |||||||||||||||||||||||||||||||||||||||||||||||||||||||||||